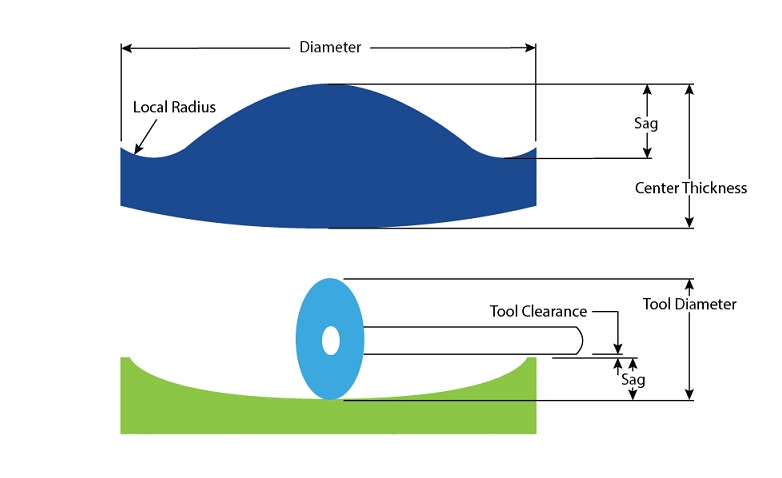
General Comments on Manufacturing Limits
This represents a general list of soft limits and is intended for reference only.
As requirements move closer to a min or max is shown the more challenging the part will be.
Certain combinations may not be possible – Choosing Max Sag and Min Diameter on concave surfaces for example.
Interferometric testing of aspheres is extremely case-specific. The slower the onset of departure, the more likely interferometric testing is possible.
During manufacturing, the lens is oversized in diameter. Be aware, forms well behaved within clear aperture may turn exotic or undefined just beyond the final diameter.

General Comments on Manufacturing Limits
Based on Form Error Tolerance
Form Error > 2μm Lower Resolution Profilometry (2-D)¹
| wdt_ID | Attribute | Minimum | Maximum |
|---|---|---|---|
| 1 | Diameter (mm)³ | 3 | 250 |
| 2 | Local Radius (mm) | -13 (Concave) | ∞ |
| 3 | Sag (mm) | 0 | 25²,⁴ |
| 4 | Departure (mm) | 0.002 | 1 |
| 5 | Included Angle (°) | 0 | 120+⁵ |
Form Error 0.5 – 2μm Higher Resolution Profilometry (2-D)¹
| wdt_ID | Attribute | Minimum | Maximum |
|---|---|---|---|
| 1 | Diameter (mm)3 | 3 | 250 |
| 2 | Local Radius (mm) | -12 (Concave) | ∞ |
| 3 | Sag (mm) | 0 | 25² |
| 4 | Departure (mm) | 0.01 | 20 |
| 5 | Included Angle (°) | 0 | 150 |
Form Error < 0.5μm Interferometry with Stitching (3-D)
| wdt_ID | Attribute | Minimum | Maximum |
|---|---|---|---|
| 1 | Diameter (mm) | 3 | 250 |
| 2 | Local Radius (mm) | -8 (Concave) | ∞ |
| 3 | Sag (mm) | 0 | 50² |
| 4 | Departure (mm) | 0.01 | 20 |
| 5 | Included Angle (°) | 0 | 120 |
- Typical metrology is Zygo MetroPro plots for interferometry
- For concave surfaces the maximum may be smaller, limited by tool clearance first. Short radii have lower maximums
- Larger diameters can be accommodated using multiscan fusion
- Total sag allowed is a function of diameter, determined by fringe resolution of the interferometer
- Very basic forms (paraboloid, ellipsoid) can have higher included angles


